Over the past few weeks, I've been diving deep into NestJS - a progressive Node.js framework that's become the backbone of the startup I'm interning at. This blog represents my journey from understanding the basics to Advance.
Why NestJS Matters in 2025
NestJS isn't just another Node.js framework. It's a TypeScript-first, enterprise-ready solution that brings structure to the often chaotic world of Node.js development.
Key Benefits:
- Architecture-first approach - No more spaghetti code
- TypeScript integration - Catch errors at compile time
- Powerful dependency injection - Testable and maintainable code
- Modular design - Scale without complexity
- Enterprise-ready features - Built for production applications
🧩 Core Building Blocks of NestJS
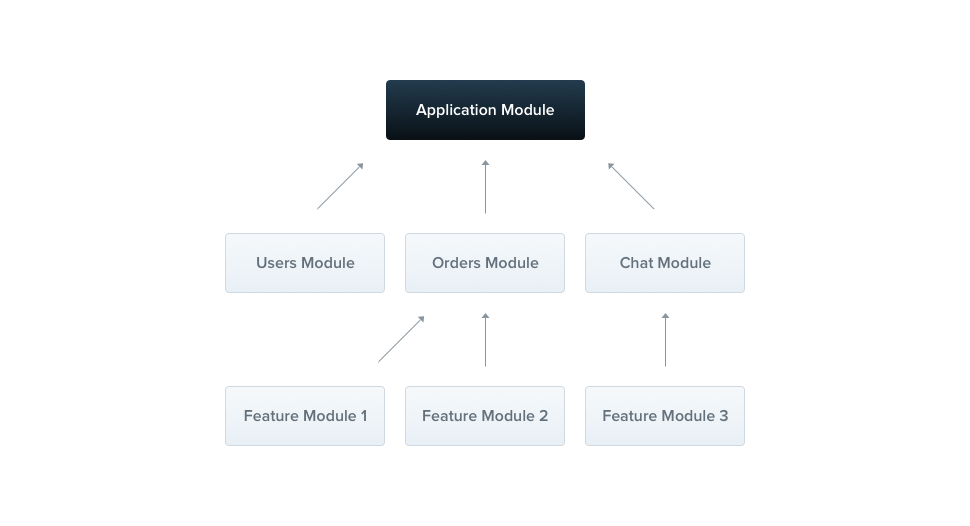
1. Modules - The Foundation
Modules are the architectural foundation of every NestJS application. They group related functionality together.
@Module({
  imports: [DatabaseModule, AuthModule],
  controllers: [UserController],
  providers: [UserService, UserRepository],
  exports: [UserService]
})
export class UserModule {}
Key Insight: Modules should represent business domains, not technical concerns.
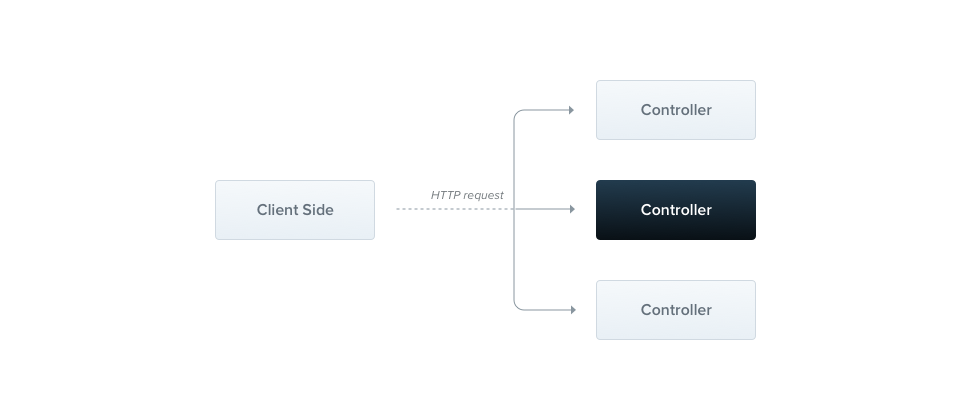
2. Controllers - The API Gateway
Controllers handle HTTP requests and responses. Keep them thin and focused on HTTP concerns.
@Controller('users')
export class UserController {
  constructor(private readonly userService: UserService) {}

  @Get(':id')
  @UseGuards(AuthGuard)
  async findOne(@Param('id', ParseIntPipe) id: number) {
    return this.userService.findById(id);
  }
}
Best Practice: Controllers should only handle HTTP concerns - validation, authentication, and response formatting.
3. Services - The Business Logic Layer
Services contain the core business logic and are injectable, testable, and reusable.
@Injectable()
export class UserService {
  constructor(
    private readonly userRepository: UserRepository,
    private readonly logger: Logger
  ) {}

  async createUser(createUserDto: CreateUserDto): Promise<User> {
    this.logger.log(`Creating user: ${createUserDto.email}`);

    const existingUser = await this.userRepository.findByEmail(createUserDto.email);
    if (existingUser) {
      throw new ConflictException('User already exists');
    }

    return this.userRepository.create(createUserDto);
  }
}
Critical Learning: Services should be pure business logic, not HTTP-aware.
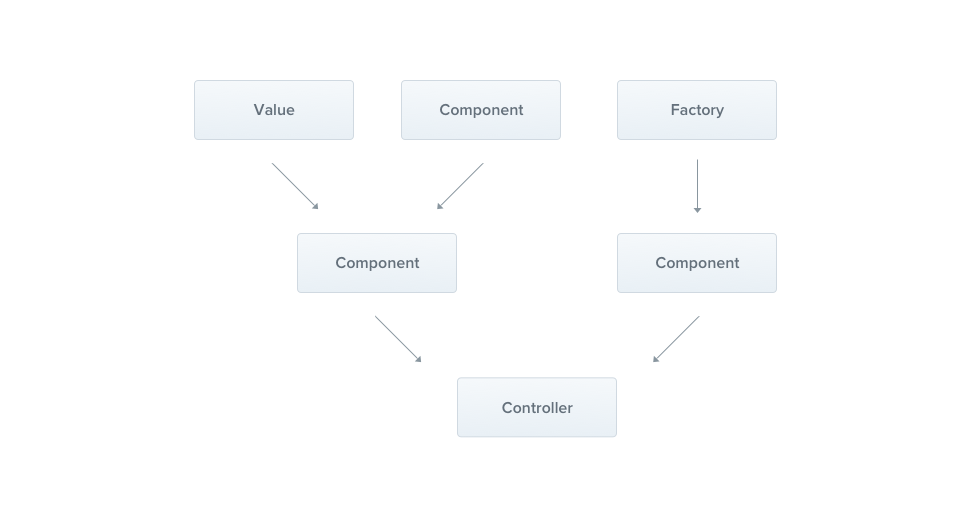
4. Dependency Injection - The Glue
DI makes everything work together seamlessly and enables easy testing.
// Before: Tight coupling
class UserController {
  private userService = new UserService(new UserRepository());
}

// After: Loose coupling with DI
class UserController {
  constructor(private readonly userService: UserService) {}
}
Why It Matters: Testing becomes trivial, and components are loosely coupled.
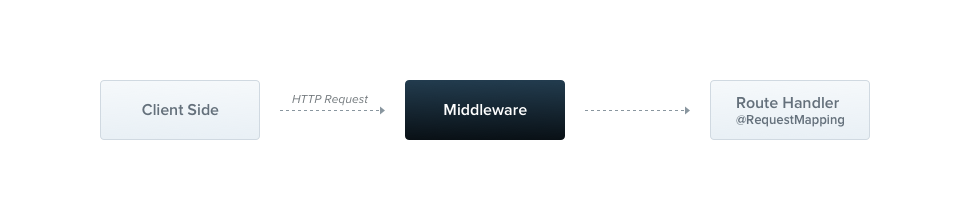
5. Middleware - Request Processing
Middleware functions run before route handlers for logging, authentication, or request modification.
@Injectable()
export class LoggerMiddleware implements NestMiddleware {
use(req: Request, res: Response, next: Function) {
console.log(`${req.method} ${req.url}`);
next();
}
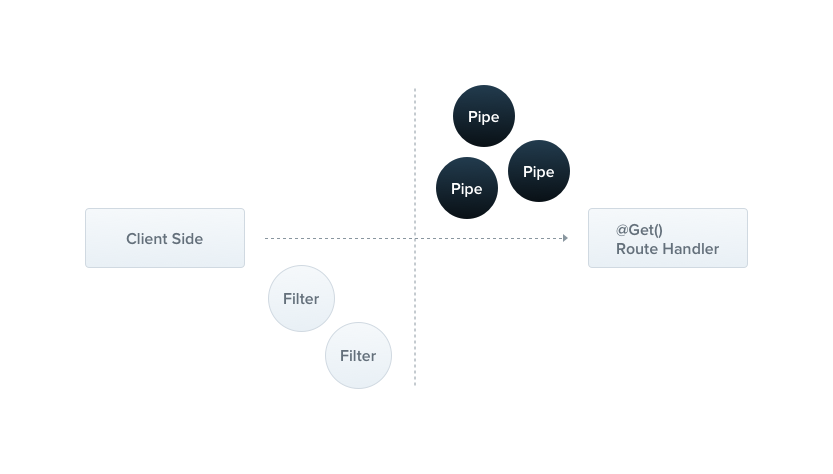
}6. Pipes - Data Transformation & Validation
Pipes transform and validate incoming data before it reaches your route handlers.
@UsePipes(new ValidationPipe())
@Post()
create(@Body() createUserDto: CreateUserDto) {
return this.userService.create(createUserDto);
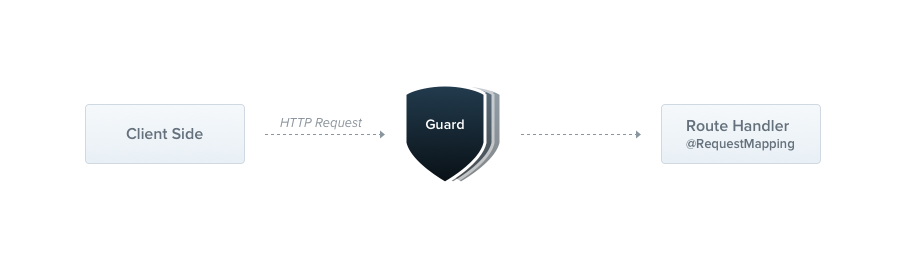
}7. Guards - Authentication & Authorization
Guards determine whether a request is allowed to proceed.
@Injectable()
export class AuthGuard implements CanActivate {
canActivate(context: ExecutionContext): boolean {
const request = context.switchToHttp().getRequest();
return request.headers.authorization === 'secret';
}
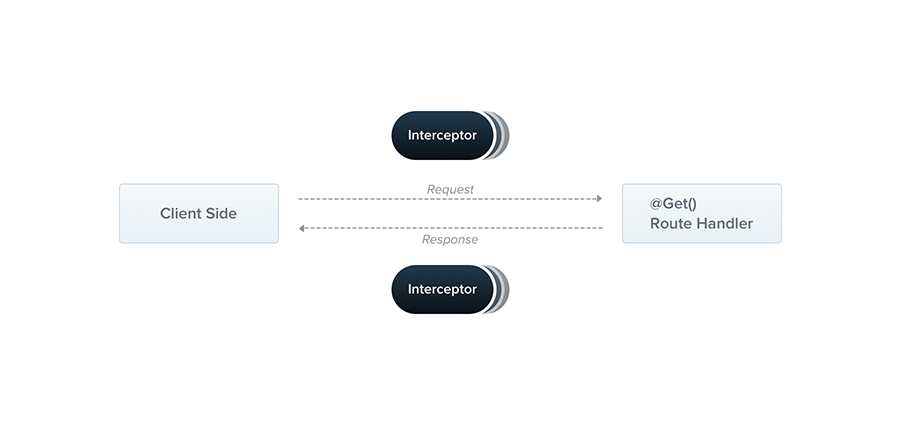
}8. Interceptors - Request/Response Transformation
Interceptors wrap method execution for logging, caching, or response transformation.
@Injectable()
export class LoggingInterceptor implements NestInterceptor {
intercept(context: ExecutionContext, next: CallHandler): Observable<any> {
console.log('Before...');
return next.handle().pipe(tap(() => console.log('After...')));
}
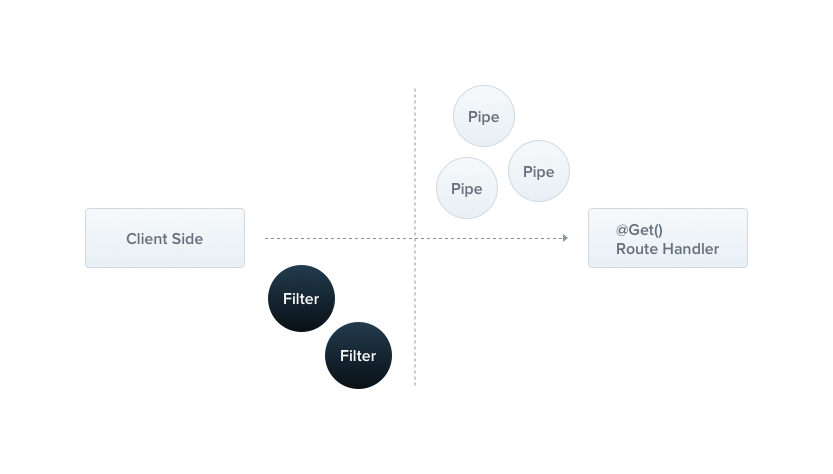
}9. Exception Filters - Error Handling
Handle errors gracefully with custom exception filters.
@Catch(HttpException)
export class HttpExceptionFilter implements ExceptionFilter {
  catch(exception: HttpException, host: ArgumentsHost) {
    const ctx = host.switchToHttp();
    const response = ctx.getResponse();
    const request = ctx.getRequest();
    const status = exception.getStatus();

    response.status(status).json({
      statusCode: status,
      timestamp: new Date().toISOString(),
      path: request.url,
      message: exception.message,
    });
  }
}
10. Application Configuration - Global Settings
Configure your application with global settings.
// Global prefix for all routes
app.setGlobalPrefix('api');

// Enable CORS
app.enableCors();

// Global validation pipe
app.useGlobalPipes(new ValidationPipe());
11. Logging - Built-in Logger Service
NestJS includes a powerful built-in logger with configurable levels.
// Available log levels: log, error, warn, debug, verbose
this.logger.log('User created successfully');
this.logger.error('Failed to create user', error.stack);
12. Lifecycle Hooks - Application Events
Hook into the application lifecycle for resource management.
@Injectable()
export class DatabaseService implements OnModuleInit, OnModuleDestroy {
  onModuleInit() {
    // Initialize database connection
  }

  onModuleDestroy() {
    // Clean up database connection
  }
}
Rate Limiting
Protect your APIs from abuse:
@Throttle(10, 60) // 10 requests per minute
@Get('profile')
async getProfile(@Request() req) {
  return this.userService.findById(req.user.id);
}
Async Operations
Handle concurrent requests efficiently:
@Get('users')
async findAll(): Promise<User[]> {
  // Parallel execution for better performance
  const [users, count] = await Promise.all([
    this.userRepository.find(),
    this.userRepository.count()
  ]);

  return users;
}
🛡 Best Practices
- Use feature modules to group related logic
- Keep controllers lightweight - delegate logic to services
- Apply ValidationPipe globally for security
- Centralize logging & exception handling
- Secure APIs with Guards and rate limiting
- Follow SOLID principles for maintainable services
- Use DTOs for data validation and type safety
- Implement proper error handling with custom exceptions
Conclusion
NestJS has transformed how I think about backend development. It's not just about writing code; it's about writing maintainable, scalable, and testable code. The learning curve was steep, but the payoff is immense.
The framework provides a modular architecture, TypeScript-first approach, and enterprise-ready features that make building production applications a joy rather than a chore.
For anyone starting their NestJS journey: focus on understanding the architecture first, then dive into the implementation details. The framework will guide you toward better practices and help you build applications that scale.
This blog represents my current understanding of NestJS. As I continue learning and building real applications, I'll share more insights and practical examples.